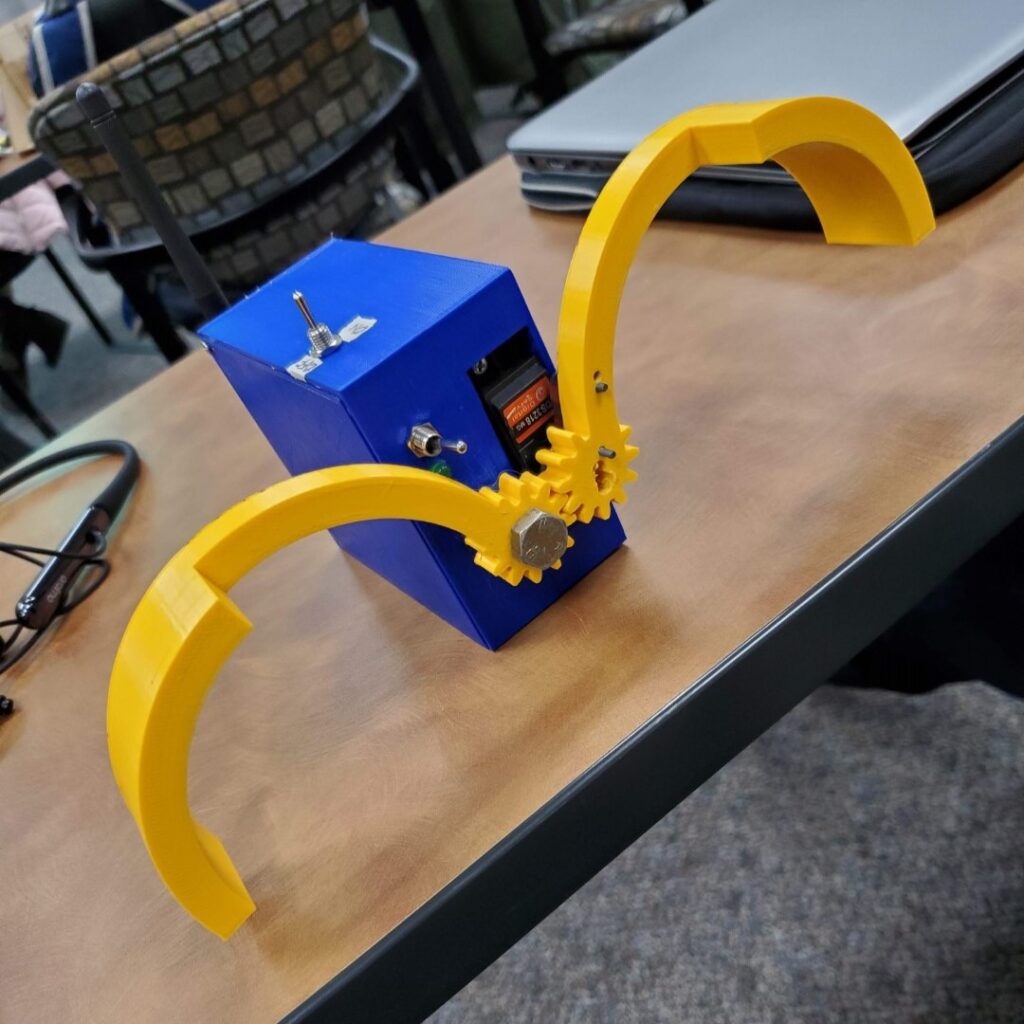
Remote Controlled Robotic Gripper

Introduction
In collaboration with a fellow student, we embarked on a challenging project as part of the ME 8283: Design of Mechatronic Products course: create a device that could remotely transport objects and integrate seamlessly with existing remote-controlled vehicles, like drones. This project provided the perfect opportunity to not only delve into the fascinating world of mechatronics but also hone our teamwork skills and collaboration strategies. Together, we envisioned a sophisticated robotic gripper, divided into three main components: the transmitter, receiver, and gripping mechanism.
Design Details: Transmitter and Receiver
We kicked things off with the transmitter, the control center of the whole operation. It was powered by a battery and had a simple three-position toggle switch: open, neutral, and close. Think of the switch like a translator, taking your commands and putting them into a language the gripper understood. At the heart of the transmitter was a microcontroller, the brains of the system. It took your switch clicks and turned them into signals. These command signals were sent wirelessly through a transceiver to the receiver. To keep things running smoothly, the transmitter had a dedicated voltage regulator, like a tiny power station ensuring everything got the juice it needed.
The receiver’s core was the PIC16F18426 microcontroller unit (MCU), interpreting transmitted commands to control the gripper’s actions. Powered by two distinct batteries, one for powering the microcontroller unit and another for powering the servo motor. Communication was enabled by the nRF24L01+ radio module, allowing for long-range interaction up to 1000 meters under optimal conditions. The radio module interfaced with the MCU via the Serial Peripheral Interface (SPI), ensuring reliable data transmission. The servo motor, driven by the MCU, executed the gripping actions through pulse width modulation (PWM). Configurable through firmware, the servo’s responses to open, close, and idle commands were precisely executed, adjusting the gripper arms to the required angles for capturing and releasing objects.
In this project, the printed circuit boards (PCBs) were fabricated using the Bantam OtherMill Pro CNC machine, a state-of-the-art tool designed for precision milling. This machine allowed for the creation of highly detailed and accurate printed circuit boards essential for the functionality of the remote-controlled robotic gripper. The OtherMill Pro is renowned for its ability to handle intricate designs and fine lines, making it an ideal choice for creating the complex circuitry required by this project.
Skills and Knowledge for the Future
This project underscored my abilities in embedded systems design, wireless communication, and mechanical engineering. It demonstrated my knack for problem-solving, my commitment to sustainable and efficient design, and my ability to bring complex projects from conception to reality. As I look towards the future, I am eager to apply these skills and knowledge to new challenges, pushing the boundaries of what’s possible in embedded systems hardware and robotics.
Skills
- Circuit Design and Prototyping
- CAD Design with Fusion360
- Electronics and Robotics
- KiCAD
- CNC PCB Fabrication
- PIC Programming
- Project Pitching and Presentation
Acknowledgment
Thanks to Jeremiah Bonde for coming up with the project idea and collaborating with me.


